Showing posts with label create. Show all posts

Thursday, October 23, 2014

Halloween Garland


I love crafting around the holidays, and Halloween is one of my favorite holidays. I have been wanting to figure out an easy craft that one could easily do with kids, and also with items nearly everyone already has on hand. Simple projects are definitely my favorite and this one is SUPER simple.
 You will need:
cardboard to create your triangle bunting (I used bits of cardboard and also a cut up cereal box), yarn or twine to attach the bunting to, tape to secure the cardboard to your string, either construction paper or paint will do for decorating the cardboard, and finally a sharpie to create the jack-o-lantern faces on the orange bunting pieces. Super simple. The process is pretty self explanatory and easy to mix up for other holidays or occasions.

There you have it, a super easy way to get festive for Halloween (or fall!) with items you most likely have on hand.
-Reagan

Monday, October 13, 2014

5 Projects To Try This Autumn

 Since it's finally getting colder out and we're all wearing our favorite sweaters I thought it would be the perfect time to share a few projects that you can work on while snuggled up inside. I know I spend a lot of time indoors this time of year and that means crafting! Plus all of these diy projects are perfect for working on while you're catching up on your favorite TV show or reading blogs ;)


1. Owl Garland
This a cute and easy way to make your home a bit more festive this fall. Just save your toilet paper rolls and make them into this owl garland. This is a great project for kiddos too!


2. Knotted Crochet Headband
 This is a great project for beginner crocheters that will keep your head and ears nice and warm this fall and winter. It would also make a great gift around the holidays!

3. Make A Rug
This project can be a little time consuming but it is the perfect crochet project to pick up ever so often. I like to have a few quick projects to work on and a few long term projects as well. This is a project that would fall into the long term category depending on how large of a rug you want. Either way it is another good beginner crochet project to try this fall.

4. Make a Weaving
Weaving has been a super popular craft project this year so if you haven't tried to make one of your own this autumn is the perfect time to try. You don't need to know how to crochet or knit and they make great gifts.

5. Crochet Slippers
Another crochet project, what can I say? They're my favorites! These crochet slippers take some assembly but they're sure to keep your feet warm around the house this fall and winter.

I hope this inspired you to get crafty and make something when you're cooped up inside this fall, and definitely let me know if you decided to try out any of my fall friendly projects ;)
-Reagan


Friday, September 5, 2014

Knotted Crochet Headband


 I'm back with another clothing crochet project. This summer and fall I have been doing my best to add more easy clothing projects to the blog. I love projects like this one that are both incredibly easy and super cute. This crochet headband is cozy and since I used a neutral color it will be perfect to wear all Autumn long. I used the same crochet method I did with my crocheted pot holders, but this time the headband is a chain of only 12 long. I crocheted using my own head as template as I went and then crocheted the two ends together. To create the knotted section I crochet another seperate piece and twisted it before joining its ends and crocheting it onto my headband. That's it. super easy.


I really love how this project came out. I love knotted and turban style headbands and a crochet or knit version is the perfect way to carry this trend into fall and winter. I'd love to make more of these headbands in some more fall and winter hues. 

Let me know if you try this project, I'd love to see your results.
-Reagan

Tuesday, September 2, 2014

Granny Stripe Beanie


It has been a long term goal of mine to crochet a beanie without using a loom and I decided to try to tackle that project recently. This is my first attempt at crocheting a beanie, and overall I'm satisfied with how it came out. There are definitely improvements to be made, but for a first attempt it's not so bad.


 I began by trying to follow this tutorial, but it wasn't working with the weight of yarn I had so I stopped after following her instructions for the brim of the hat. And simply crocheted around the hat in a granny stripe pattern since I'm familiar with the stitches.


 The hat turned out rather large but it makes for a good slouchy beanie.
It's not bad for a first try but I think I will definitely try crocheting another beanie again soon.
-Reagan


Wednesday, August 27, 2014

Simple Crochet Pot Holder


 This is a project I have been wanting to tackle for a while now. Crocheting a pot holder really doesn't seem like it would be so difficult but I've struggled with it. The trouble has been that I've tried doing variations of granny square pot holders and there are just too many holes. The holes in the pattern leave hot pans exposed so they are only useful trivets. This time around I just crocheted simple double crochet stitches, 28 across, and about 15 stitches tall. I simply crochet to one end, flip it and go back across.


 To create to cable knit look I just crocheted into only one side of the stitch and repeated this method for the whole pot holder. To make sure the pot holder was thick enough I crocheted Two 28(w) by 15(h) swatches and attached them with a slip stitch all the way around.


I'm pretty happy with how my crocheted pot holder came out and I can't wait to make a few more. This project would be so easy to make in different colors and even designs to suit anyone's taste. I think black and white striped pot holders would be perfect! Maybe next time.
-Reagan

Thursday, August 7, 2014

Weaving Project No.3


 It has been a little while since I worked on a new weaving but I was recently inspired to revisit an old project after reading This Weaving Basics Post over on ABM. I have always wanted to add more texture to my weaving projects and I knew I could easily alter an old project and update it to fit my home decor even better. I choose a weaving I have yet to share on the blog and in true form I forgot to take the initial before picture but I think the photos I did take can demonstrate the process anyway. 


I added the bottom fringe first which is around two or three layers of fringe of a multi-colored rather thin yarn and kept the strands kind of long. I trimmed that up and then decided I was satisfied so I moved up the weaving and switched out to a lighter speckled kind of yarn and did another few layers of tassels and then did one layer of cream colored tassels. I trimmed all those to be even and then moved on the to center portion of the next layer and added some long single tassels to two layers in the center and then finally I added a five strand tassel to the center and trimmed the mint yarn into a point.


After that I decided to add wooden beads to the top of my weaving like my last weaving project and I changed out the string it was hanging from for a neutral one. Then I rehung it in my living room in my recently rearranged gallery wall. I love the texture and pop of color it adds to this display.


I love how this project turned out and I feel reinspired to weave again! This has me wanting to make a larger weaving with a LOT of texture :) 
Have you tried to weave yet? what were your results?
-Reagan

Saturday, July 12, 2014

Heart Doily


 I love a good crochet project and I hadn't had a crochet project to work on in a while so I went looking. I found this one while looking through the diy & craft feed on pinterest. I love doilies. I've even crocheted a few myself. They're incredibly easy to make and take very little time and yarn. This particular pattern only uses basic stitches like slip stitches, chain stitches, & double crochet stitches. I'd say this project would be simple for someone who can easily crochet a granny square.


The doily is pretty small and could be used as a coaster because of it's size, but I think they're too pretty. I found a spot on a bookcase that seemed perfect for this one and then quickly made another heart doily for another like nook that seemed like it needed a little something else too. 

Doilies like this are great for making other projects too. I'd love to try making a doily runner for my coffee table or even some doily garland for the holidays. 
What would you use a heart doily for?
-Reagan

Friday, June 27, 2014

Ombre Godseye

 Did you ever make godseyes when you were younger? I remember them being really quick and easy to make, and after seeing a few godseye pins floating around my pinterest feed I decided that I should try to revisit this easy project.

 1. For a traditional simple godseye you will need two sticks, popsicle sticks, skewers with flat edeges, whatever, and some yarn or twine. I used some left over bits and decided to go with a ombre pattern. I began by tying the sticks together using my lightest color of yarn, wrap the yarn around the two sticks a few times, then separate them to form an X shape and wrap around with yarn again until the center is somewhat secure. 
2. Begin by pulling the yarn strand underneath your stick, bring the yarn strand over the other side of the stick and then back under. Repeat the wrapping process around each stick, going around in a clockwise motion.

 3.When you finish your first color cut the yarn off leaving a little bit a the end. make a small knot around your stick and align the remainder of yarn with the stick.
4. Tie on the new yarn, slightly darker color yarn, and wrap over the little yarn that is remaining from before. Repeat the process from step two.

 5&6.  Continue wrapping with the progressing darker colors of yarn until you reach the end of your sticks.
 & that's it. You can try wrapping the yarn in different ways to try to create more designs in your godseye if you'd like. The point is to have fun with it. Try using some ribbon along with the yarn to add texture, the possibilities are endless.

I'm pretty happy with how mine came out :) It isn't perfect but that is part of the appeal of handmade projects to me.
I tied on a little extra yarn to hang my ombre godseye in this wall arrangement.
What do you think?
Let me know if you try this easy project, I'd love to see!
-Reagan

Saturday, June 21, 2014

DIY Earrings


 I have been interesting in making jewelry for a while now but it's one of those things where you just don't know where to begin. I decided to begin by trying to making some fairly simple earrings.


 These were the supplies I ended up purchasing. I didn't end up using them all, but this way I have more supplies for my next jewelry project :) You will also need some needle nose pliers. I strongly recommend getting jewelry pliers because I had a somewhat difficult time using the needle nose pliers I had at home.  The process is simple enough, grab one of the pieces from your earring kit that looks like a push pin, thread on your beads leaving room at the end. Bend the end of the remaining wire to form a small loop at the end, close the loop using the pliers so the beads cannot come off. Pull the loop around the larger size earring hook around toward the front closure. It should rest in a little groove in the wire. That's it.

 Here is how my earrings turned out. This is a really great beginners project for jewelry making if you're interested in giving it a try. The most difficult part of the whole process is just shaping the loop at the end of the wire (& I'm sure there's probably a simple way to do it that I just don't know about).

 I'm really happy with how my earrings came out and am now totally excited to try out all sorts of new jewelry projects. 
Have you ever made jewelry? Tell me any tips you may have!
-Reagan


Friday, June 6, 2014

Crocheted Slippers

 The other day while trying to brainstorm ideas for new clothing DIY's I remembered the crocheted house slippers I wore around my grandma's house growing up. This is a project I had attempted to do before but never finished, so I knew it would be the perfect project to revisit.

 This is another really simple crochet project that comprised of 6 granny squares per slipper, I joined the squares with a half double crochet stitch all around the squares, including the opening for the foot. The size of your granny squares will depend on the size you want the slippers to be. My granny squares were 3 rounds and were roomy for me (women's size 9) and snug for my husband (men's size 12).
 This is another quick project as well, it took me one day of work ( I crocheted pretty consistently taking a few breaks). I think this is a really great project to make for children or as a homemade gift for someone. Everyone can use a pair of house slippers ;) & of course, you can make them in any combination of colors to suit anyone's taste.

This another quick clothing project that I'm sure I'll be working on again soon. 
-Reagan

Saturday, May 31, 2014

Crocheted Collar Pt. 2


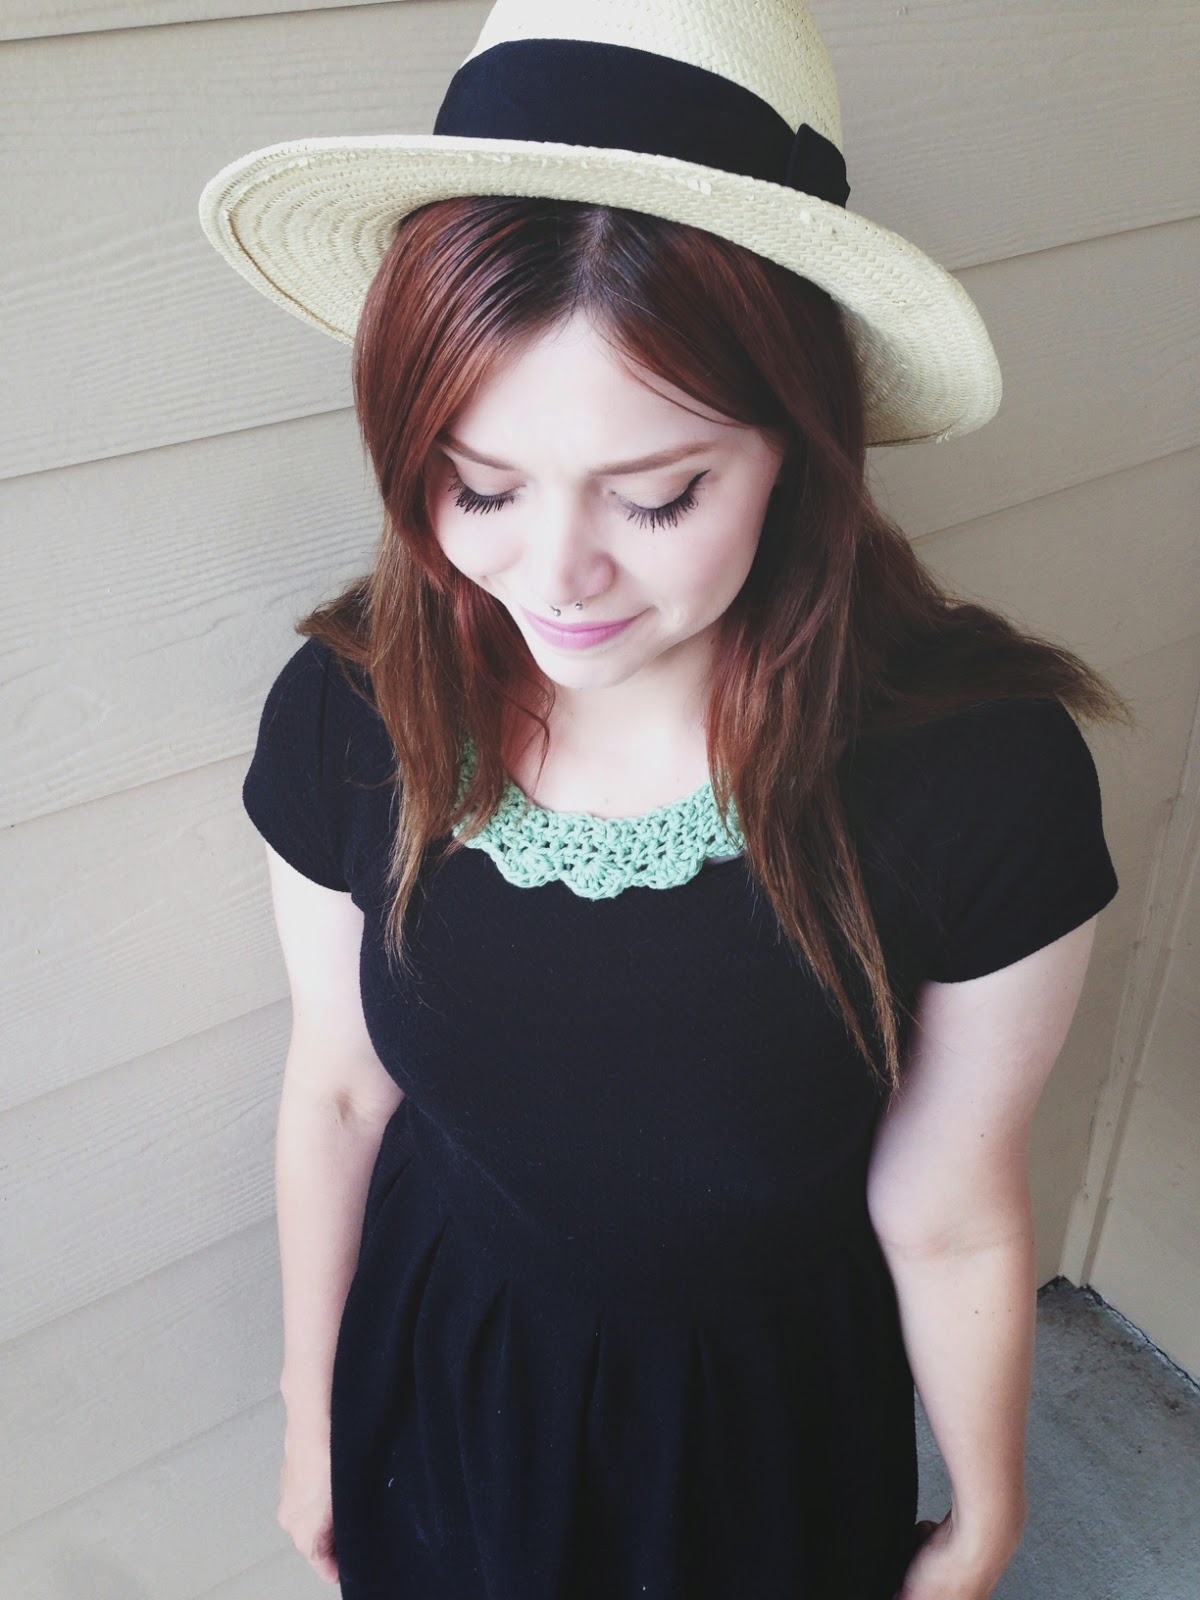
One of my biggest goals for HN this spring and summer has been to share more clothing diy projects. I've been trying to brainstorm some new projects and while attempting to crochet a headband I made a scalloped collar instead. I have made crocheted collars before, but it's a project I really wanted to revisit and put a new spin on.

This project is actually really simple and took me less than an hour (maybe even less than thirty minutes, it's a super quick project). I simply crocheted a chain to the length I wanted (in this case it was just large enough to fit over my head). Then I joined the chain to form a circle. The next step was to double crochet around the the circle for two rounds. The final step was to crochet around the circle using the shell pattern. That's it! super simple.

 I love how this collar turned out and how quick it was to make. I know I'll be be making some more soon because it's just too easy!
Do you know any cool clothing diy projects I just gotta try?
-Reagan