Showing posts with label pinterest. Show all posts

Tuesday, July 30, 2013

Diy: Turban Handband


Begin by cutting two pieces off the bottom of a cotton t-shirt (I used a men's small), the pieces should be 3-5 inches wide.


lay the pieces down in a cross formation with the pieces slightly off from the middle.


 Fold the vertical piece over first and then the horizontal piece over that. It should look like the image above.

 separate the halves in to top a bottom sections.
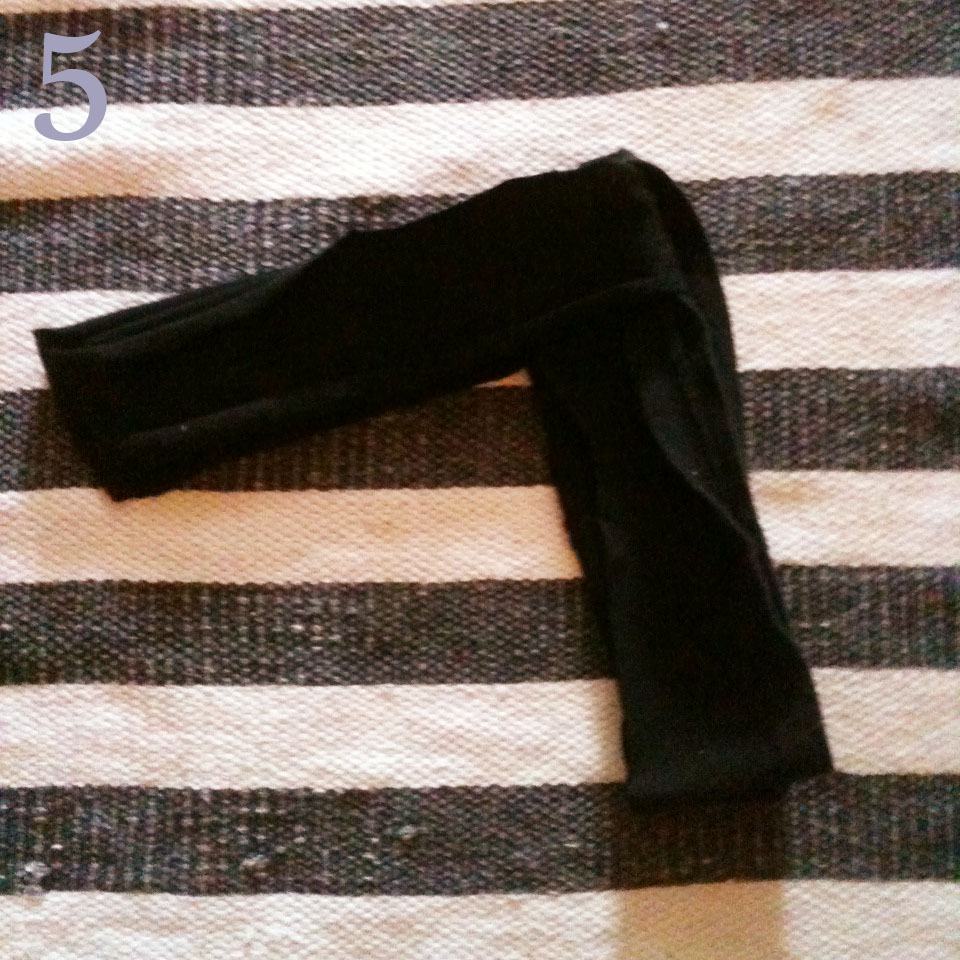

fold the bottom pieces into the top pieces (on both sides) so that it looks like the above image. (you may have to tuck in some bits and arrange the knot a bit to get it to sit right).

Repeat the process of tucking the upper section into the lower section (your head band should be the inception version of a headband. 4 layers, a headband within a headband). flatten and arrange your knot to make it the most comfortable. viola! you have your very own turban headband!


 I suggest using a solid color fabric for this as it hides any weird folds or what not. These headbands work great for girls with or without bangs and are also super handy for gym use! You can add little stitches to hold the pieces in place if you'd like but it's still easy to wear without. The best thing about this DIY is that you can finally find a use for any old T shirts you've had lying around. nothing better that a DIY that costs no money ;)

 This (as usual) is a pinterest inspired project. To find the original instructions check out Cultured Blog. (Her instructions are a bit more comprehensive so if you have any questions after following mine, do be sure to take a peek at her's as well!)

-Reagan

Thursday, July 25, 2013

Raspberry and Blackberry Buttermilk Pie


In my last recipe post I shared a recipe for dutch apple pie and explained that my love of pie stemmed from a childhood in which I was spoiled with pie by my grandma. Her dutch apple pie was always my favorite, My brother liked her lemon meringue pie, and my sister's favorite always was buttermilk pie. I knew when I stumbled upon this pin while browsing pinterest that I had to try to make this pie. 
The original recipe I used can be found here, but as usual I modified it slightly.


 Begin by preheating your oven to 325 degrees F.

This recipe will require one 9 inch frozen pie crust.

For the Raspberry-blackberry swirl you will need 1/4 cup of raspberries and 1/4 cup of black berries (frozen or fresh will work) and 3 tablespoons of white sugar. Combine the ingredients in a small sauce pan over medium low heat. Stir mixture and crush berries until the mixture is somewhat smooth. Set mixture aside.


For the buttermilk portion of the recipe you will need
3/4 cup of white sugar
2 tablespoons all purpose flour
1 teaspoon lemon zest
3 Large eggs
3/4 cup of buttermilk

In a large mixing bowl add the sugar, flour and lemon zest, and combine. Add eggs to the mixture one by one while stirring continuously (if using an electric hand mixer set it to low setting). After eggs have been added pour buttermilk into filling and stir until mixture is smooth. Pour buttermilk mixture into the pie crust.  Add raspberry-blackberry filling to the pie by spooning dollops evenly in the buttermilk filling. Use a knife and or skewer to marble the raspberry-blackberry filling. Place the pie on a baking sheet and bake for 40 minutes or until mixture is done via a fork text. 


 This pie is pretty darn good. It's not like the buttermilk pie my grandma used to make, but it's a new favorite. The lemon zest and blackberries just make it taste to summery and it reminded me almost of black berry cobbler. Anthony said it tasted like black berry lemon meringue pie to him. We both agreed it would be perfect for the holiday season as well. The truth test will be when my sister gets to try it. ;)
-Reagan


Friday, June 28, 2013

woven and crocheted basket


 In March I published this post about my first experience with weaving. I really enjoyed the results and ended up making a second woven wall hanging so I could have one in both my bedroom and living room. I recently had been looking through my diy board on pinterest and found this pin. I was inspired and decided to use this basket weaving tutorial. As with most of the diy projects i stumble upon, I did not have the materials so I improvised by using a nylon rope and some yarn to create my basket.


 The basket it actually pretty flimsy so I put it around a jar to stabilize it but still show off the texture of the yarn and rope. (this is a great way to use up scrap yarn as well)
 I just put a few crochet hooks and a paintbrush in my jar, but you could use it as a planter or vase as well!


Next time I do a project like this I think I might try using plarn (plastic yarn) instead so the basket has a little bit more structure. :)
-Reagan

Wednesday, May 1, 2013

Mint and Grapefruit Lemonade


 Last month the creative girls over at A Beautiful Mess shared their Rosemary Lemonade recipe and like so many of their other posts it found it's way to my pinterest boards. Today I felt inspired to give their recipe my very own spin. For our wedding last September Anthony and I received a pretty awesome juicer that we search for any excuse to use. So after restumbling upon the rosemary lemonade recipe we pulled it out of the kitchen cabinets and got to juicing.
I don't know about you but citrus feels summery to me, and that's what we were going for. we've been having nice warm weather and something about lemonade just seemed appropriate. I also happened to have a grapefruit on hand so I went ahead and juiced it too. We followed Emma's original recipe and tweaked a few things here and there. Here is our version of the recipe.


1 Medium Sized Grapefruit
2 Small Lemons
5 Small Limes
1 Cup of Sugar
7.5 cups of Water
Mint and Rosemary

Begin by juicing your citrus (if you don't have a juicer you can use a lemon squeeze) then put the juice in your refrigerator. Next combine 1.5 cups of water and 1 cup of sugar in a small sauce pan over medium heat. Stir continuously until the sugar is dissolved, then remove from heat. Add some torn up mint and a sprig of rosemary to the syrup while it cools. While the syrup mixture is cooling, combine your citrus juice, and 6 remaining cup of cold water in a large pitcher. Once cooled remove the mint and rosemary then add the syrup to the juice and water mixture with the rest of your mint and sliced lemons as a garnish. Refrigerator until ready to serve. 

(This is also delicious as a cocktail, try adding a few shots of malibu rum or flavored vodka!)

This recipe is also wonderful because you can adjust it for other flavors quite easily. We can't wait to make more fresh drinks from home this summer!
What flavor combinations are you loving for this spring/summer?
-Reagan


Thursday, March 14, 2013

making a rug, part one

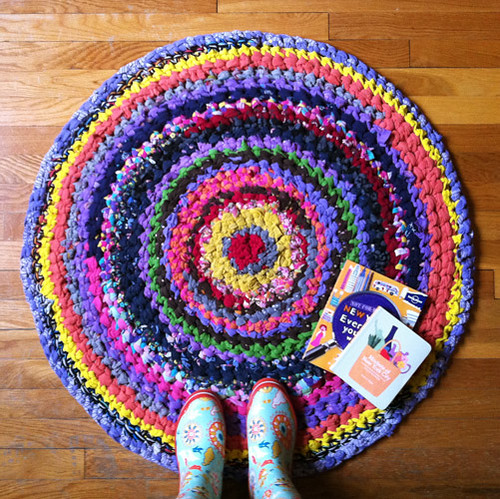
You may have noticed i took a little break from blogging here. took a vacation real quick, but i'm back now. more details on the trip later ;) today i wanted to share my latest project for my "create" series. I came back from my vacation refreshed and inspired to take on a slightly bigger project. I was browsing around pinterest when I came upon this photo:
 (originally from artsyville)

I had been interested in making a rug and this particular one was a scrap rug that was crocheted by hand. I believe she used cut up t-shirts but i decided to stick with yarn so i could better control the material and so that i could choose the colors :)


obviously the texture of my rug is pretty different from my inspiration photo's but it is still pretty tightly crocheted together. I've been using the links artsyville provided, especially this crocheting for dummies link for reference on crocheting in the round or in a circular motion rather than in a square or rectangular pattern.
 I approached mine by creating an initial 6 chain stitch and joining the chain with a slip stitch. I then created the rug by spiraling consecutive single double crochet stitches. If this is confusing then I would recommend following the tutorial links I referenced!
In almost every pattern I've tried and with this one as well, I did make a few mistakes and a few more alterations, but I like to think that's part of the learning process. 
So far I've worked on this project for around two days off and on, and feel as though it will be completed with at least one more day's worth of crocheting. I haven't decided how to finish it off, but I'll be back to shared the finished project soon!
-R 

Thursday, December 13, 2012

Christmas Baking Inspiration


all these images and more Holiday inspiration can be found on my Holidays pinterest board.
Whats your favorite Christmas cookie recipe?
-R

Sunday, December 2, 2012

Winter Eating

you may remember this chart I shared with you from thefoodloverskitchen in October. Well Today I'm going to follow up with the next installment of Seasonal Eating, with Winter Eating. By knowing whats in season you can shop smarter and still eat healthy. 
source: pinterest
source: pinterest


source: pinterest

beets
belgian endive
cabbage
celery
citrus
clementines
escarole
horseradish
kiwi
mandarins
onion
parsnips
pears
pommelos
rutabagas
sweet potatoes
turnips

Can you recommend any winter eating recipes?
-R


Saturday, December 1, 2012

goodbye november, hello december.

source: via pinterest

I haven't shared any inspiring images or pretty prints in a while, and although november has come to an end, it's still the blog's namesake.


source: via pinterest


This bridesmaids screen shot, via pinterest

hope these brightened your day just a little bit.
-R

Sunday, November 18, 2012

Friday, November 9, 2012

5 Things: Imagery

 source: found via pinterest
source: found via tumblr
source: via pinterest by Jenny Keith-Hughes
 source: smileandwave

To see more pretty art and pictures check out my Imagery  board on pinterest.
-R
 

Tuesday, October 30, 2012

Autumn Checklist Progress

 
I am the type of person who makes checklists for everything, whether it be a to-do list, a grocery list or a wishlist, I love making lists. I find that putting my goals or ideas onto paper help makes them concrete, and also helps them stick more strongly in my memory. For some strange reason I had never thought to make seasonal checklists. I think I originally saw this over at A Beautiful Mess.
Since I'm a little late to the game I figured I can at least show my progress since October is almost over already!

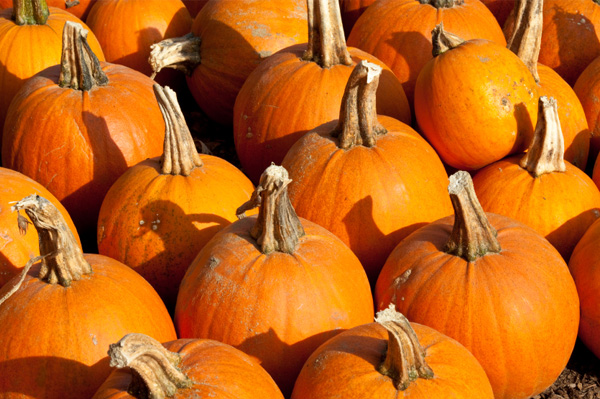
- go to a pumpkin patch
- wear lots of orange
make pumpkin flavored foods
- take a lot of pictures
- try an autumn seasonal beer
- make autumn owl garland
- have a scary movie night
-try out thanksgiving recipes
- work on our wedding album
- carve pumpkins
- reorganize the apartment
- drink more coffee and chai tea
- cook and bake more
- craft and repurpose as much as possible
-crochet and read more

As you can see I still have a lot of autumn activities to get to so that I can mark (or bold, in this case) them off my checklist.

What Autumn traditions do you have that you look forward to every year?
-R

Monday, October 29, 2012

Inspiring Interiors: Cozy Bedrooms

source: unknown, found via pinterest
source: everyday lovely 
source: Unknown, found via pinterest

Each of these bedrooms are simple, but they have pops of color or other surprising elements that give each room their own personality.
what elements do you need in your bedroom decor?
-R 

Wednesday, October 24, 2012

Autumn Eating

Shopping seasonally isn't only smart because it's budget friendly, it's also the best way to get the freshest ingredients for your kitchen. Thanks to this nifty little chart I can share which fruits and veggies are in season in the fall.
  
Arugula  -  Broccoli
Brussels Sprouts  -  Cauliflower
Collards  -  Chiles
Cranberries  -  Curly Endive
Fennel  -  Grapes
Kale  -  Lemongrass
Limes  -  Pomegranates
Pumpkins  -  Shallots
Swiss Chard  -  Winter Squash


source: she knows

I'm hoping to use these fresh ingredients to cook with as much as possible this fall. Be on the look out for recipes with autumn ingredients in the near future!
-R